 Skip to content
Why are my Instagram posts blurry? It’s a question almost every user asks after seeing a sharp photo turn soft and pixelated right after uploading. You take a perfect shot, it looks great in your gallery, but once it’s on Instagram, the quality drops.
That happens because of Instagram’s built-in compression, data saver mode, large file sizes, or a few wrong settings. What starts as a crisp image often ends up as one of those blurry uploads everyone dreads.
This guide explains why your instagram photo quality changes after posting and how to fix instagram blurry photos, whether it’s a feed post, story, or DM, so your pictures stay clear and professional
What Happens To Your Photos When You Upload Them On Instagram
Every time you upload a photo to Instagram, it doesn’t stay in its original form. Behind the scenes, Instagram automatically compresses every image to make it fit the platform’s standards. Even if you upload a 4K shot, Instagram will resize it to a maximum width of 1080 pixels and convert it into a JPEG file, no matter what format you started with.
This process, known as Instagram file compression, makes the photo smaller in size but also reduces its sharpness. You might notice slightly faded colors, softer details, or minor pixelation. It’s not your camera’s fault; it’s simply how the platform manages billions of uploads daily.
Instagram does this to keep the app running fast and to help images load quickly on all devices, even with slower connections. It’s a smart system for performance, but the downside is image quality loss. So if your upload looks different from what you see in your gallery, it’s because Instagram reduces quality to balance visual clarity with speed.
That’s why understanding how photo resolution and upload quality work is the first step toward keeping your pictures looking as sharp as possible.
Why Are My Instagram Posts Blurry
Instagram posts turn blurry because the app compresses your image size, converts it to JPEG, or reduces quality due to data saver mode, wrong aspect ratio, or weak internet connection.
There are several small but important factors that affect upload quality on Instagram. Even if your photo looks sharp before posting, one wrong format or connection drop can turn it into a low-resolution image once it’s uploaded.
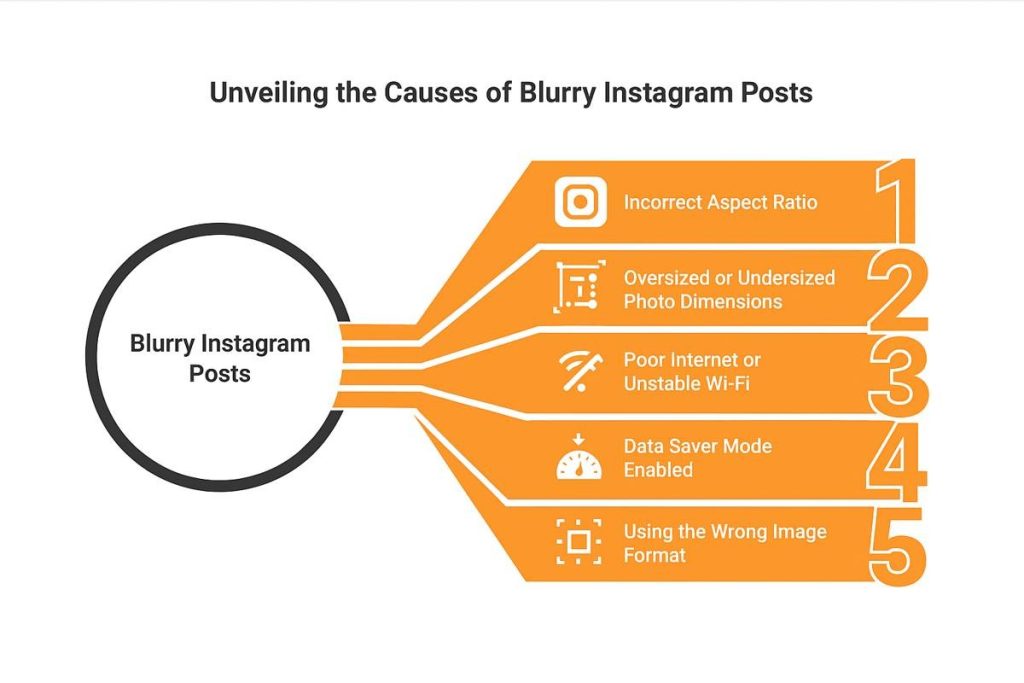
Incorrect aspect ratio:
Instagram only supports certain aspect ratios, 1:1 (square), 4:5 (portrait), and 16:9 (landscape). If your image doesn’t match these ratios, Instagram crops or stretches it, which can reduce quality and cause blurriness.
Oversized or undersized photo dimensions:
Images smaller than 320px or wider than 1080px trigger compression. That means Instagram automatically resizes them to fit the limit, which lowers clarity and detail.
Poor internet or unstable Wi-Fi:
A weak connection during upload can cause partial data transfer. When that happens, Instagram uploads a compressed version of your photo, resulting in a fuzzy or grainy look.
Data Saver mode enabled:
If you’ve turned on Instagram Data Saver, the app intentionally lowers photo quality to reduce data usage. It’s great for saving bandwidth but bad for image sharpness.
Using the wrong image format:
Formats like HEIC or PNG may look fine on your phone, but Instagram converts them to JPEG. Each conversion step slightly reduces upload quality, leading to visible softness or dull colors.
| Cause | Why It Happens | Quick Fix |
| Large File Size | Triggers compression | Resize to ≤1080px width |
| Wrong Format | Converts HEIC/PNG to JPEG | Export manually as JPEG |
| Data Saver On | Uploads at lower quality | Disable Data Saver |
| Weak Internet | Upload interrupts | Use strong Wi-Fi |
Keeping an eye on your file size, aspect ratio, and internet connection before uploading can make the difference between a sharp, professional-looking post and a blurry disappointment.
Why Are My Instagram Posts Blurry On My Phone
If your photos look sharp in your camera roll but blurry once uploaded from your phone, the issue usually comes down to how Instagram handles mobile uploads. The app automatically adjusts upload quality based on your connection type and settings, especially when you’re using mobile data instead of Wi-Fi.

When uploading over cellular networks, Instagram applies extra data compression to save bandwidth. That means even a high-resolution photo can lose detail and appear softer. Using Wi-Fi instead of mobile data helps keep your uploads closer to their original quality.
Another common reason, especially for iPhone users, is HEIC to JPEG conversion. iPhones save photos in HEIC format by default, but Instagram doesn’t support it directly. The app converts it to JPEG during upload, and that conversion can slightly reduce sharpness or alter colors.
Sometimes, the problem starts before you even upload. Photos taken with low camera resolution, or a dirty lens, can already lack clarity, and Instagram’s compression only makes it worse.
Here’s how to fix it:
- Open Instagram and go to Settings → Data Usage and Media Quality.
- Turn ON “Upload at Highest Quality.”
- Make sure Data Saver is disabled.
- Upload your posts over a stable Wi-Fi connection rather than mobile data.
Following these steps helps prevent quality loss caused by poor internet connection, unstable Wi-Fi, or automatic image compression during uploads, whether you’re on iPhone or Android.
Why Is My Instagram Post Blurry Before Posting
If your photo already looks blurry before you hit upload, the issue likely starts during editing or exporting. Many users don’t realize that every time you edit and save a photo, especially across different apps, the file can lose resolution. Over time, this repeated compression reduces sharpness and detail.
Editing apps like VSCO, Lightroom, or Snapseed sometimes apply their own compression when exporting. If you use the default export settings, your photo may already be resized or downgraded before Instagram even sees it. That’s why the final post looks soft from the start.
To keep the photo resolution intact, always export at a width of 1080 pixels, 300 DPI, and in JPEG format. These specs match Instagram’s own standards, so the platform won’t need to reprocess or downsize your image again.
Before uploading, open the exported file in your phone gallery and zoom in. If it looks clear there, it will likely stay clear on Instagram too. Taking a few seconds to check this can save you from wondering why your instagram post looks blurry before posting.
Why Is My Picture Blurry On Instagram Story
If your photo or video looks fine in your gallery but turns blurry after posting to your Story, it’s because Instagram story compression is much stronger than what’s used for regular posts. Stories are designed to load fast, even on slower networks, so Instagram re-encodes your content into a smaller file with lower bitrate. The trade-off is reduced instagram story quality , meaning softer details and less color depth.
Another factor is how you upload. Photos taken directly with Instagram’s in-app camera are already optimized for its format, while those pulled from your camera roll often go through extra compression. That extra step can make an otherwise crisp image appear fuzzy or pixelated.
To avoid a blurry Instagram story stick to these quick fixes:
- Use Wi-Fi instead of mobile data for uploads.
- Avoid zooming in on your photo, zooming reduces clarity before upload.
- Keep your story at a 9:16 aspect ratio and under 30 MB in size.
- Go to Settings → Data Usage and Media Quality → turn off “Use Less Mobile Data.”
By keeping your file within the right specs and using a stable connection, your Instagram Stories will stay sharp and clear instead of turning into low-quality uploads.
Why Are My Instagram Posts Blurry After Editing
If your photos look perfect in your editing app but lose clarity once uploaded, you’re not alone. blurry Instagram posts after editing is a common issue caused by how third-party apps handle file compression. Tools like Lightroom, Canva, or Snapseed often reduce the file size automatically when you export, especially if you choose a lower quality or wrong resolution.
Each time you export and re-save an image, you’re applying another layer of compression. This gradual loss affects image clarity, sharpness, and even colors. By the time the photo reaches Instagram, the platform applies its own compression again, doubling the quality loss.
To keep your photo resolution intact, always export your edits as JPEG at 100% quality with a width of 1080 pixels. This matches Instagram’s upload standards and minimizes extra resizing. Also, go easy on filters that blur textures or over-smooth skin, they can make your images appear soft even before upload.
If you edit in apps like Canva or Snapseed, double-check export settings before saving. It takes a few extra seconds but ensures your edited photo stays sharp and detailed when it goes live on Instagram.
Why Are My Instagram Pictures Blurry When I Post Multiple
If your Instagram carousel looks crisp on the first slide but noticeably softer on the next ones, you’re not imagining it. Instagram compresses multi-image uploads more aggressively than single-image posts to save bandwidth. That’s why your blurry Instagram carousel isn’t necessarily a camera issue, it’s how the platform processes files.
When you upload pictures with different aspect ratios or resolutions, Instagram tries to adjust them to fit its standard layout. This often leads to uneven compression. The first image might stay sharp, while the others appear slightly washed out or fuzzy.
Here’s how to keep your carousel images looking clear:
- Resize all photos before uploading, use the recommended Instagram photo size: 1080 × 1080 px for square or 1080 × 1350 px for portrait. If you want to crop your images accurately before posting, use the Effeect Image Crop Tool, it helps you match Instagram’s exact aspect ratios and avoid unwanted compression.
- Avoid mixing orientations. Don’t combine portrait and landscape images in one carousel, it forces Instagram to crop and compress unevenly.
- Keep file types consistent. JPEG works best for most uploads; mixing in PNGs can also affect how compression is applied.
By keeping all your images uniform, you give Instagram less reason to over-compress them, and your audience gets a smoother, sharper scrolling experience.
Why Are Photos On Instagram DM Blurry
If you’ve ever sent a great photo through Instagram DMs only to see it turn into a pixelated mess, you’re not alone. Instagram automatically compresses direct message images down to about 640–720 pixels. That’s a big drop from the 1080p quality you see on the main feed.
The reason is simple, speed and data efficiency. DMs are built for quick sharing, not high-resolution delivery. Compressing files helps images load faster and saves bandwidth, especially for users on slower connections. The trade-off is that your Instagram DM photo quality takes a noticeable hit.
To keep your images sharp, try one of these options:
- Send as an “HD photo.” The newer versions of Instagram allow you to choose this option before sending. It preserves much more detail.
- Share via a cloud link. Upload your photo to Google Drive, Dropbox, or iCloud and send the link instead, this keeps the low resolution image issue out of the equation.
In short, the blur isn’t a glitch. It’s how Instagram keeps DMs fast, but a quick settings change or link share can help you keep the original quality intact.
Other Fixes To Improve Instagram Photo Quality
Even if you’ve done everything right with sizing and compression, small habits can still affect how sharp your photos look on Instagram. Here’s a short checklist of quick, reliable fixes to keep your uploads looking their best.
- Update the Instagram app regularly. Each update often includes bug fixes and image processing improvements that affect photo clarity.
- Clear cache or reinstall the app. On Android, clearing cache removes corrupted data that can distort uploads. On iPhone, reinstalling can refresh how images are handled.
- Upload with a strong Wi-Fi connection. Poor connectivity can cause Instagram to compress your photo more aggressively to make the upload faster.
- Avoid screenshots. Always post the original file — screenshots reduce sharpness and color accuracy.
- Stick to Instagram’s size limits. Keep your images within 1080px width and 1350px height to avoid forced resizing.
Keep your photo file size moderate — ideally under 1 MB. Large images often trigger heavier compression on Instagram, which can make them appear soft or pixelated. If you need to reduce size without losing clarity, try using the Effeect Image Compressor before uploading. It keeps your visuals sharp while meeting Instagram’s optimal upload limits. - Check your camera lens and lighting. A clean lens and good lighting make a bigger difference to perceived quality than filters or editing apps.
These small steps don’t take long, but together they can noticeably improve how your feed and stories look, no advanced tools needed.
Best Upload Settings And Formats For Instagram
If you want your photos to stay sharp after posting, uploading them in the right size and format is key. Instagram automatically compresses and resizes images that don’t fit its preferred specs, so using the right settings helps preserve the original detail.
Below is a quick reference table for the best upload settings across different post types:
| Type | Aspect Ratio | Ideal Size | Format |
| Feed Post | 1:1 or 4:5 | 1080×1080 or 1080×1350 | JPEG |
| Story | 9:16 | 1080×1920 | JPEG or PNG |
| Carousel | 1:1 or 4:5 | 1080×1080 / 1080×1350 | JPEG |
To keep image quality consistent, always stay at or below 1080px in width and export at 80–100% quality before uploading. Instagram’s system is optimized for that range, so anything larger will just be compressed down.
When choosing formats, stick to JPEG for most uploads, it offers the best balance between quality and file size. Use PNG only if you need transparency, since it often leads to heavier compression and slower uploads.
Following these specs not only keeps your feed visually consistent but also helps avoid the dulling or blurring that happens when Instagram reprocesses oversized images.
Quick Checklist To Prevent Blurry Instagram Posts
- Use the correct aspect ratio and JPEG format for best clarity.
- Turn off Data Saver and enable “Upload at Highest Quality” in settings.
- Avoid uploading over weak or unstable mobile data connections.
- Export photos at 1080px wide before posting to reduce extra compression.
- Clear cache regularly and keep the Instagram app updated.
- Keep your photo file size under 1 MB to balance sharpness and upload speed.
Following this quick list helps maintain Instagram photo clarity and minimizes compression, so what you see on your screen is what your followers see, too.
Conclusion
Blurry Instagram photos rarely come from your camera, they’re almost always the result of compression and a few wrong upload settings. Instagram automatically reduces file sizes to save bandwidth, which can lower photo clarity if the image doesn’t match its preferred format.
The good news is, you can easily fix it. Upload over a strong Wi-Fi connection, stick to the JPEG format, and use the correct aspect ratios and sizes for every post. Consistent upload habits make a bigger difference than any filter or editing app.
Once you understand how Instagram processes images, keeping your feed clear becomes simple.
FAQs
Why Is My Instagram Feed Blurry?
Feed photos look blurry when uploaded in the wrong resolution or format. Always use 1080×1080 for square posts or 1080×1350 for portrait to match Instagram’s processing.
Why Do My Instagram Highlights Look Blurry?
Highlights reuse your story uploads, so if the original story was compressed or low-quality, the highlight will stay that way. Re-uploading with HD settings enabled improves future highlights.
Why Do HDR Photos Look Bad On Instagram?
Instagram doesn’t fully support HDR files. When uploaded, they’re flattened into standard color profiles, which can wash out contrast or distort brightness. Convert HDR photos to standard JPEGs before posting.
Should I Post At 4K Or 1080p On Instagram?
Stick to 1080p. Instagram automatically downscales 4K images and videos, so posting higher resolutions only triggers more compression without any visible benefit.
How To Fix Blurry Photos On iPhone?
Clean the camera lens, use proper lighting, and avoid zooming in digitally. When exporting for Instagram, use 1080 px width and High Efficiency (JPEG) settings to prevent extra compression.
Why Is Instagram Changing The Color Of My Photos?
Instagram converts all images to its own color profile (sRGB). If your file uses a different profile, tones may shift slightly. Export your edits in sRGB JPEG format to maintain color accuracy.
How Do I Turn Off Blur On Instagram?
There’s no universal “blur off” switch, but you can reduce it by disabling Data Saver, enabling Upload At Highest Quality, and always posting the original high-resolution photo instead of screenshots.


